Sound production began halfway through editing and I began with extracting the dialogue I needed from the recording files I had originally recorded. Once the top two layers where finalized with the dialogue files, I started on adding sound effects on the next few layers. The sounds I had planned to use would be a mix of realistic and traditional cartoon sounds, depending on where they would be needed. Though I already had numerous sound effects from my animatic and more I gathered over the last couple of weeks, Additional one had to be downloaded to create a more in-depth atmosphere as my film also depended on sound as well as the quick animation.
Editing for my film began just near the end of composition for me and the two overlapped for the first few days. Once the animated files where done in After Effects, the composited files where brought over to Premiere Pro to be edited. The scenes where imported as a whole first, to time out the entire film first as I knew some scenes would need to be lengthened in order for them to read properly. Organisation was key if I wanted this section of post-production to run smoothly, so I created and named several folders that would allow me to find the clips and files I needed quickly. Cutting and editing the files took the better part of two days, and my film suddenly extended by over twenty seconds.
To give the establishing shot of my film a bit more character, I decided to employ a Fog Effect to give the scene a more 'spooky' vibe to it. The scene comprised of several layers that made up the image and also already had a trucking shot in on the kitchen window of the house, so i know I would need to figure out how best to insert the effect without throwing the entire perceptive off.
After watching several tutorials on YouTube, I managed to create a believable Fog Effect by following the simplest tutorial I could find. By employing the Fractal Noise Effect, I created the Fog by messing with the effect controls and then duplicating the layer and changed it's settings also. This allowed me to create a thicker Fog that appeared to have more depth to it as it was not simply just moving one way or held the same thickness.
Composition began several days behind due to a delay in animation, however from the beginning I aimed to only a small amount of composition done in After Effects as much of it was done in ToonBoom at this point. However I did decide to bring in the project files, rendering them out as separate image sequences and added several effects on to both the characters and the background. One of the consistent effects I used most frequently, was the Matte and Highlight effect to give the characters a more rounded appearance.
Another consistent effect I employed was the use of the shadows, using the fill effect and messing around with the opacity to get a desired shadow. I was able to also play around with positioning by making the layer a 3D shape and tweaking the shape on three different planes.
Over the course of the two weeks for the Easter Holidays, my productivity was boosted to a level I had seen only in the second and third week of production. From the Monday onward, I broke the animation into two separated parts, the first week would be dedicated to the second part of my film where I hoped to get at least 30-seconds of animation done while the later week would see me trying to finish the start and any other difficult scenes. The first week produced over 40-seconds of animation, reaching my set quota by Wednesday and the additional animation was finished bt the Saturday. Production slowed into the next week as I began to crash from working long hours throughout the previous week and thought I could achieve the same level of production into the second week. By Thursday evening of that week, I had little over 20-seconds done, no where near what I thought I would be. Pacing myself through the Friday and onto the weekend, I managed to meet the quota for that week, however I was frustrated that I would have to then extend my animation time and eat into the time I had set aside for composition. I surprisingly faced very little problems in the way of technical difficulties, only suffering through a rather annoying Toonboom crash that wiped nearly 40 minutes of work after the auto-save seemed to glitch out. My main problem was the motivation to finish my workload for the day as I often found myself doing other stuff other than the project.
(Toonboom; A finalized lip-sync that I colour tested.)
This week was short on production as the class had an impending trip from the Thursday through to the weekend. However I did try to get as much work done as I could in the few day at the start of the week. To try and make up for the days I knew I would be losing, I stuck to simpler scenes in the animation that I knew I could get done in under an hour. However, I underestimated the amount of animation needed in some scenes and soon found myself bogged down in the more complex ones. I managed about 8 seconds of animation this week, far less then I had originally hoped for. However, I realized for the time I had, that amount of work was not bad, though I could have managed my time better for a more effective outcome. When I returned on the Saturday night, I was hoping to do some work the following day, however I barely managed to put three scenes together on Sunday. I plan to catch up on the work that is needed to be done over the Easter break.
This week was spent getting as much of the line work as I could as I would be away next weekend for the Dingle Animation Festival. It proved to be my most productive week so far as I managed to meet my 20-second quota for this week and also get some of the work I was behind on from the previous week. I quickly set into a routine at the beginning of the week in terms of the workload, pacing myself in order to get the 4-seconds of animation needed for the day and whatever time was left over in the day was used to tackle the work from the previous weeks. I also took making sure that the files from the animation were organised properly and titled like we were shown some weeks ago to keep better track of them. On top of that I have also began adding the scenes that are near completed to the lock-in animatic so as I can see how the animation is playing out.
Before we began production on our degree films, the class was handed a Production Tracker and filled it out. The production sheets are used in order to keep track of our schedule and to apply our time accordingly. The sheets are dedicated to various aspects of the production, such as asset tracking and animation tracking, that are controlled via preset dates that we set out for ourselves.
Over Schedule
This sheet is the main sheet used in tracking what needs to be done at what point in the production schedule. It is in this sheet that the aspects of pre-production, production and post-production are sorted and outlined using different colour coordination so that I can follow them more easily. The sheet is the overall tracker for my production and allows me to see what needs to be done that month.
Asset Tracking
Assets are the aspects of the film that are animated or are placed within the actual animation. The tracking sheet is used to keep check of what assets are finished and need to be completed.
Animation Tracking
The sheet comprises of the number of animation scenes in the whole film and the seconds they hold. The animation tracking sheet allows me to mark off W.I.P and finalized animation which is shown in the progress Sheet.
Progress Chart Sheet
This sheet is the foremost important aspect of the production tracking as it provides an overall look at the progress of the production schedule and features a countdown of the number of days left for the animation and other aspects.
This week has proved to be more productive than last as I have managed to meet my quota of 20 seconds this week, only because of last week's minimal production. A slight setback occurred at the beginning of the week in which I found I was once more missing two backgrounds I needed for the opening scenes of the animation. I could not find it among my files and had somehow managed to delete the original layered art file and so sent an additional several hours finished them off. I have however, managed to finish the animation for the first few scenes to a reasonable standard in that they are much easier to flow, though most of it is of yet still uncoloured. I finally feel I am getting back into the flow with Toonboom as I managed to produce three scenes in one day near the end of the week. Though looking at the opening few scenes, I am tempted to remove two scenes from the beginning as to me they seem to play little part in furthering the scenario or the story. I have once more gotten into the flow of animation, however I plan to be more productive in this coming week.
(Sudden Pain; The mother is hit by the thrown bowl of food and is burnt.)
The production of my animation began on the 26th of February with the intention of going straight into scene preparation and keyframe animation. However, the main animation was put on hold for an additional three days as my backgrounds where not completely finished and needed to be done in order to finish the scene preparation beforehand. Animation began on the Thursday three days behind schedule due to the backgrounds and further complications where faced that resulted in on 8 second being complete this week instead of my expected 20 seconds that I would need to get done in order to reach my quota for this week. Another key problem I noted was that, having not animated with Toonboom in several months, I struggled to remember what tools where which and even the shortcuts for them. However, I have finalised my backgrounds and have begun keyframing the animation for the first four scenes in the opening. I have decided to begin with the easier scenes that require little animation in them, this included the establishing shot that only required a trucking pan and still frame scenes. I am hopeful that I can make up for the additional seconds I failed to do this week in the second week of production.
(Hallway shot; Though one of the long scenes, this shot is mostly a pan-in on the door.)
(Introduction; This scene ends with the introduction of Creak, the main character of the story.)
The additional backgrounds where done in the same why as the opening shots; by using the Manga Studio software I achieved a style I was hoping for in it's simplicity.
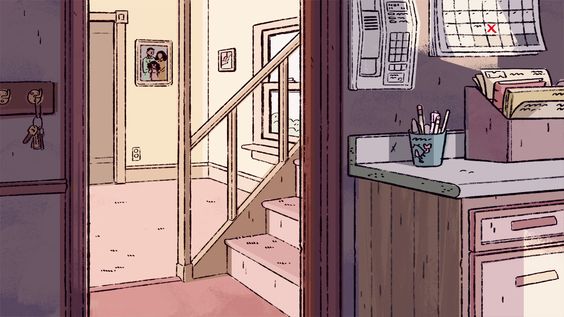
The backgrounds for my animation where designed in Manga Studio, a software that I found gave the most cartoon-like style to the type I had in mind. The backgrounds for the opening scenes are some of the more detailed ones as they appear longer in the shot.
The design for the Mother changed by shape rather than her clothing in terms of appearance. The mother is the character who mistakenly calls the wrong babysitting service and hires Creak to look after her child.
The Baby is the other main character of the story. He is the main cause to much of the trouble in the film as he refuses to sleep and causes problems for the zombie.
Having taken the advice give to me during the last presentation, I changed various parts of the story to allow it to flow easier. The key difference was the opening, where the mother is calling up the babysitting helpline and grows annoyed with her child. The original saw the child throw it's pacifier at the mother, blinding her and causing her to press the wrong button. One opening that was suggested was the mother holds the child and he vomits on her, causing her to follow the same course of action and would jump straight to the zombie entering as the mother hand him the child and rushes out the door still covered in the vomit. Though it is funny, this scene would have simply thrown off the pacing of the rest of the animation. However, I did change the scene so that the mother is in the kitchen as the child cries at the table, not wanting to eat his dinner. The child throws the hot food at the mother and thus burns her, making her unable to see.
Character design references;
The character design for the zombie changed numerous times, going from a traditional ghoul-like creature to overly bizarre creatures such as a monster with just a mouth.
(Early concept art of the zombie.)
I started to look at the work of Jamie Hewlett, a comic artist known for Tank Girl and his part in creating the fictional characters for the Gorillaz, designs that I looked into.
(Images done by Jamie Hewlett, characters of the Gorilliaz.)
The characters that embody the real-life members of the band have an angular style, similar to the style i wish to develop in my own animation. The characters resemble rather ghoulish creatures in their design that I wanted to try.
(The most recent designs for the zombie)
Saturday, 9 December 2017
Background References
(Taken from Pinterest; an early reference for the house)
(References for the bedroom environment)
(Reference for the kitchen layout; I may incorporate a change in composition similar to the bottom one)